
I tend to hoard random thrifted goodies around my apartment until I know exactly what I want to do with them. My goal is to buy only things that have an immediate purpose because my craft and sewing piles never seem to shrink no matter how many projects I complete. Sometimes, though, I find things that are so unique, or alternately so basic - like in this case, that I know I can make them something great, which is exactly what I felt about this vintage purse.
It was black, simply shaped and plain as can be. I knew it needed to be painted and though I originally bought it to paint a piano key print on (WILL still do this!), I decided to play up its envelope shape to make a cool chevron print bag. Here’s how you can do that too:
What You Need

> Purse
> Acrylic Paint(s)
> Mod Podge
> Paintbrushes
> 1” Painters Tape
> White Chalk/ Crayon
> 1” Wide Ruler
> Rubbing Alcohol & Cotton Ball
How to Do It
1. Wipe down the surface of your purse with the alcohol soaked cotton ball to get it clean.

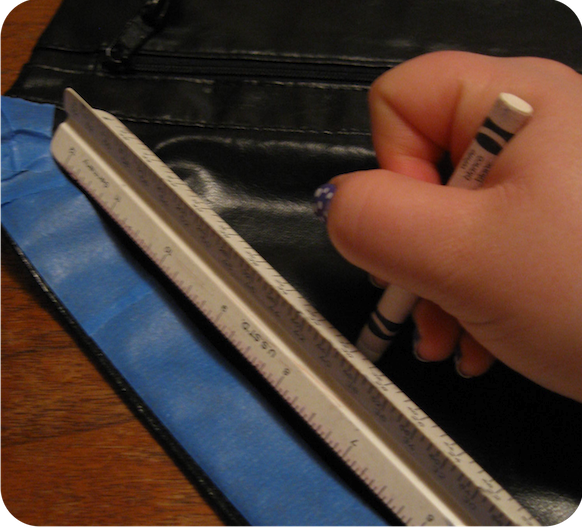
2. Using your ruler, lightly trace a vertical line down the center of your purse. This will be the point where all stripes meet.

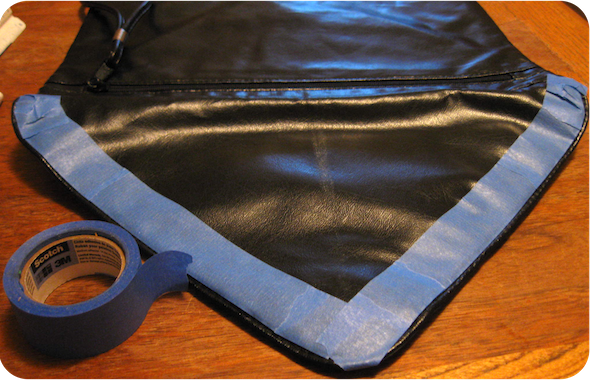
3. Starting at the bottom of the area you’re painting, line up the edge of your tape with the edge of your purse, going toward your center point. Repeat on the opposite side of the purse to form a “V” shape stripe.
4. Match your ruler up with the top edge of your tape and trace this line toward your center point.
Again, repeat on the opposite side.
5. Repeat the above process, alternating taped and empty stripes, until you run out of space. Apply tape along the sides and back of the purse where needed to avoid bleeding and accidents.


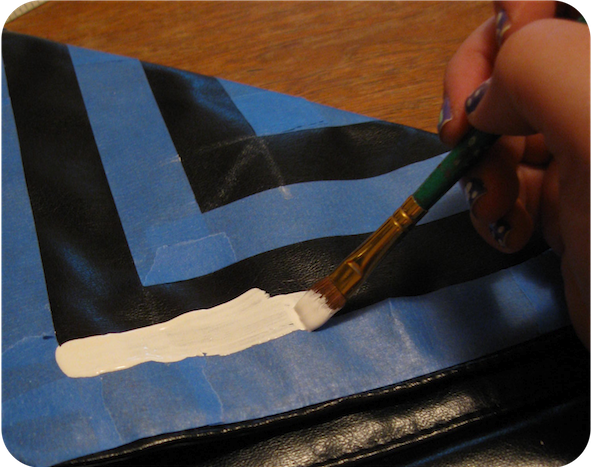
6. Apply your paint in the un-taped areas and allow it to dry completely. Apply another coat if needed. Mine took 3 coats.

7. When fully dry, apply 1 coat of Mod Podge over the painted areas. Dry completely.
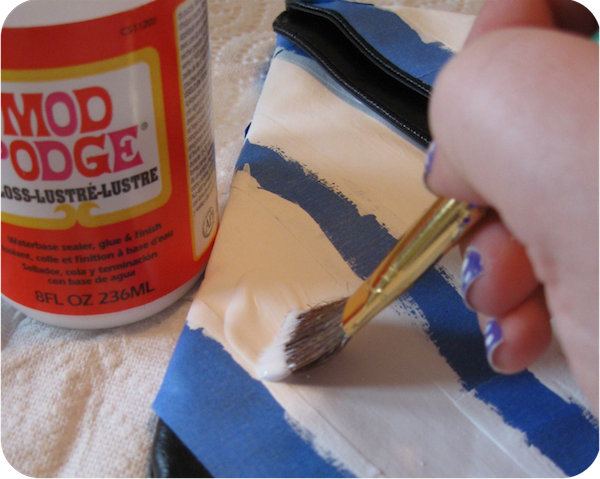
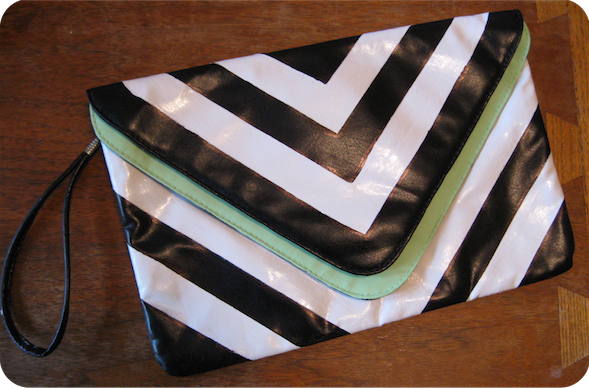
8. Remove your tape carefully to reveal a pretty and (hopefully) sharp-edge chevron stripe pattern! I opted to paint the bottom portion of the purse too and an accent color strip since my purse had a double flap thing going on.


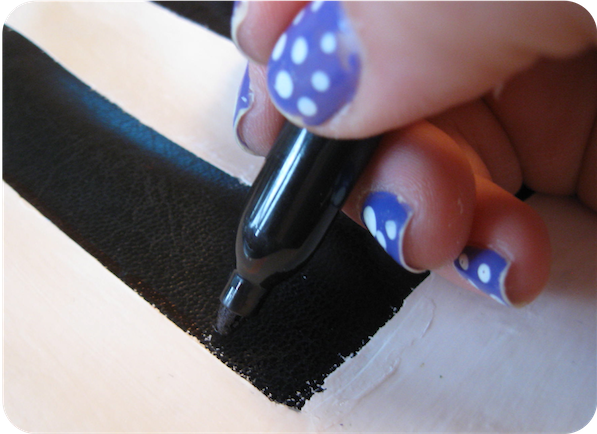
Don’t freak out if some lines aren’t crisp or you get some paint in the wrong place. I found my accidental paint drips came off pretty easily with a wet rag and hard scrubbing. You can also use a permanent marker that matches your purse to clean up any blurry edges.
It’s really that easy! I got this purse for $2.99 at Savers and with supplies I had on hand and ones I needed this bag was less than $5.00! Not bad for a one-of-a-kind piece that is tailored exactly to my style!
Let me know if you try this out – I’d love to see what ideas and color patterns you came up with!
xoxo,
Michelle
So crafty! :) I have totally gotta try this! :)
ReplyDeleteUsing the white crayon for trace lines is GENIUS! Love this DIY. I would have also never thought of using Mod Podge to seal paint. Thanks for the tips!
ReplyDeleteNo problem! I hope it goes well if you try it out!
Deletexo
Whoa, that came out super awesome!
ReplyDeleteThank you!!
Deletexo
Wow ! What a great DIY ! And your nails are awesome too !
ReplyDeletePlease, check out my blog and tell me what you think : http://selenite.weebly.com
This is amazing! I love the chevron stripe pattern lately, and this looks super easy!
ReplyDeleteI love chevron stripes too! And yes, very easy!
Deletexo
absolutely loving this DIY. the stripe pattern is always a good choice!
ReplyDeletexo TJ
What a great (and simple/cheap) way to make something your own! Plus your nails are super cute :)
ReplyDeleteLove this I wanna try this! ASAP
ReplyDelete:D
xx
C.C.
http://rosecolored-telescope-eyes.blogspot.com